
A blog to help Steiner school class teachers with painting lessons in the lower school.
'The children gain flexible inner images, flexible feelings and flexible actions of will from these experiences of colour. Everything in their soul becomes more flexible' - Rudolf Steiner.

Introduction
by Antoinette Reynolds
Painting is one
of the core subjects with which new Steiner Waldorf class teachers have to
familiarize themselves and one which is particularly close to the heart of
Diana Westlake and myself.
Diana and I are both
experienced class teachers.
Diana (now retired), taught
at Michael Hall and at the Brighton Steiner School, in Sussex in south east
England, where she was a founding teacher and I have taken two classes through
at Michael Hall. Both of
us are very aware how daunting this subject can be for a new class teacher and
had the idea that, by writing a short introduction on painting in the classroom, we might offer some support and encouragement to those who are new to this
subject.
Originally it
was Diana’s intention to produce a short booklet – something user friendly,
easy to handle and cheap to buy, to give some initial guidance – and she asked
me to help her. We both recognize that although there are some excellent books
available on the subject if one has the time to read them (and money to pay for
them!), they don’t necessarily address some of the simplest questions. We came
to the conclusion, however, that rather than produce a booklet, a blog might be
more helpful. A blog can easily be accessed all over the world, it costs nothing
and, best of all, it enables people to add comments and share some of their
children’s work.
So why do we
paint with the children? First of all, painting deeply nourishes the soul and
provides a healthy out-breathing, creating an inner flexibility. It acts as a balance not only to the more
intellectual subjects taught at school but, even more importantly, to the
inevitably technological and digital environment in which children are growing
up. Secondly, although its purpose is certainly not to make great painters of
our children, it is clear that over a long period of time it does address and
help to develop an aesthetic sense in them. Last, but not least,
experiencing colours that are free to move and blend is both joyful as well as
stimulating.
Teaching painting can feed
the teacher quite as much as the pupils and the more he or she enjoys it the more
the pupils will too. Remember, you needn’t be a trained artist in order to
develop the important qualities that will benefit the children. Fundamentally,
like all good teaching, it comes down to careful preparation.
Preparation - Outer
Although the physical preparation remains much the same for most of theLower
School
Although the physical preparation remains much the same for most of the
- A painting board (hardboard works well) – approximately 50 x 35cm. (There needs to be a class board rack to accommodate these, into which the boards slide horizontally)
- A good quality flat, bristle brush, about one and a half cm wide
- A small sponge
- A sheet of good quality watercolour paper cut to fit comfortably on the board (about 45 x 30cm)
It works well if the children work in pairs (decided by
you!) Each pair will need:
- Two jam jars filled with water (to be shared – see below)
- Red, yellow and blue Stockmar organic watercolour paints mixed with some water and placed in small glass jars or other suitable containers. Stockmar make wooden palettes in which six small glass jars (also supplied by them) fit snugly and safely. Stockmar supply two yellows (lemon and golden), two reds (vermilion and crimson) and two blues (prussian and ultramarine). Some teachers like to mix the two yellows, reds and blues; others prefer to keep them separate – that is the teacher’s choice – so they will start with a palette with three or six jars of paints.

NB.Although the six colours comprise the full Stockmar Lower School
The preparation of the paints needs to be done well before
the lesson. The paint can be mixed in a large jar, such as used for mayonnaise or pickle (approximately
four tbs. of paint to 500ml of water – although strengths can vary) and well
stirred or shaken. These can be stored in the classroom cupboard, with the
exception of the ultramarine (purply-blue), which quickly becomes very smelly
once mixed with water and is best stored in a fridge if there is one available.
The teacher will then fill the small palette jars with the range that is to be
used, ready for the tasked children to hand out.
At the beginning of the lesson, before the set up begins,
the teacher will have placed each sheet of paper in a large tray with
sufficient water to cover all the paper once immersed. Each sheet must be put
in one at a time to ensure it is immersed in water on both sides. The sheets
stay in the tray while the set up takes place. I shall explain later why we use
wet paper and the rather liquid paints, known as the ‘wet on wet’ technique.

NB. Not all teachers prepare the paper in this way. The children can also be handed out a dry sheet of paper, which they dampen themselves on both sides, using their wetted sponges.
It is good practice to allocate tasks to the children, i.e.
handing out paints, sponges, brushes and/or collecting them at the end. Tasks
help to engage the children in what they are doing and makes for a well
organised and efficient use of time. Once everything is set up, children can
individually carry their painting boards up to the tray and the teacher
carefully places the paper onto their boards, ensuring the paper lies flat and
is not too wet. The children soon learn how to do this for themselves – too
much sponging down will produce rough, bobbly paper and too little may result
in air bubbles and unevenness in the paper.
It is very important that, during this preparation time, the
atmosphere is quiet and harmonious – filled with anticipation rather than
excitement. A peaceful song helps or some quiet humming in unison, but no
unnecessary talking. If the teacher’s expectations are very clear, the children
will respond. If an accident happens (a jar of water is knocked over, for
instance) it is best if the teacher clears it up without fuss, in order to
minimise any disturbance in the atmosphere. Always have a mop, buckets and a
dustpan and brush at the ready, as accidents do happen. They will also be
needed for clearing up time.
Arrangements will have been made to keep those who finish
early usefully occupied. (See Clearing Up)
Preparation – Inner
This is equally, if not more, important. The teacher must
have given some thought to what is going to be painted and how it is to be
presented.
A little colour story or imaginative picture will hugely enhance the
experience the children will have of their painting and will bring the colours
to life. ‘Blue’ and ‘Yellow’ can have a little conversation or ‘Blue’ might be feeling a little lonely
until it is joined by ‘Red’ his friend; it might be that they are taken on
an imaginary flight with a golden sun in the sky surrounded by a blue sky, or
that they are butterflies flitting from one colour to another. Or the children might be given a seasonal theme, such as a fat, orange pumpkin resting among green foliage.The
possibilities are endless. The story should be simple, not too contrived and a
bit of humour too will help the children to engage. It is important that the
teacher has painted the ‘scene’ the day before, so that he/she speaks from real
experience, as the children will be aware of that, albeit unconsciously.
Although a double period (well over an hour) will be
allocated for a painting lesson, the actual painting part will probably not
take more than ten minutes – at least in Class 1! This should be done in
complete silence, and the concentration and deep engagement, even amongst six
year olds, is wonderful to observe.
In Classes 1 and 2 the teacher will work entirely with
colour exercises. Red with blue, blue with red, yellow and blue etc., at first
working only with the primary colours (red, yellow and blue) and later mixing
these to produce the secondary colours (orange, purple and green) and brown,
culminating in painting a rainbow colour circle. It is by means of these
exercises that the children experience and learn a great deal about colour –
their moods, qualities, tones and the effects of their combinations. At this
stage they also acquire the basic painting skills which will enable them, from
Class 3 onwards, to begin to paint pictures from the curriculum.
The ‘What?’ and
‘How?’ of painting
Although many children will have painted before (perhaps at
Kindergarten or at home), once they enter the Lower School
The brushes are of a good quality and need to be handled
well and be looked after properly. The children are taught how to hold them

and how to brush gently before any paint is applied. A good
way to practise this is by getting them to gently brush the back of their free
hand or cheek.
Once everything is in place, the teacher might get everyone
to stand up for a little painting verse and then the lesson is ready to begin. Here
is an example of one such verse:
‘There’s a bridge of
wondrous light,
Filled with colours
shining bright,
Red and orange,
yellow, green,
The fairest colours
ever seen;
Blue and violet,
magic rose,
Down from heaven to
earth it goes.’
Alternatively, you can make up your own. Some teachers don’t
recite one at all but younger children are helped to enter into a quiet,
reverent mood by a verse and in my experience it is good. One more thing to
think about before the actual painting starts: do you want the children to sit
down or stand up while painting? Some teachers might allow either.
The teacher now guides the children towards a certain colour
by means of a little story and will ask the children to dip the brush carefully
into the chosen colour. If the brush has soaked up too much paint (this very
commonly happens) the children can dab the brush carefully on their sponge to
get rid of the excess. They then follow their teacher by placing the brush onto
the paper to start painting. The strokes should be small and as controlled as
possible. Some children will want to paint very long strokes as though they are
painting a wall (!), others will immediately start ‘drawing’ shapes and outlines;
still others will feel afraid to allow the paint to touch the pristine white
paper. Through example, the teacher will show how small and delicate dabs of
colour will slowly build up the shape. In Classes 1 and 2, in which painting
consists entirely of doing colour exercises, it is particularly important that
the children are kept free from pre-conceived notions and don’t try to paints
‘things’. The colours ‘play’ together, sometimes mixing, sometimes not
(depending on the story); they are painting a mood and not a scene or an
object.
Here are some examples from Class 1:


It is very important that children are taught early on how to clean their brush before dipping it into a fresh colour. They place their brush first into one water jar (without pushing it down too hard against the bottom as that damages the brush) and then dip them into the second jar, to ensure the brush is doubly clean. The children can carefully squeeze out the excess water in the brush between thumb and index finger and/or dab the brush onto their (clean) sponge. The brushes are now ready to receive another colour. Brush cleaning is an important technique and it will take a while before
it is fully acquired, so be prepared for the palette jars to become ‘dirty’ to
begin with. These will have to be washed out and replenished with fresh paint
before the next lesson. If the children manage well, the palette jars can be
reused for the next time.
Accidents
These do happen, of course...
A child might spill or splash
paint or water on his or her painting or on that of their desk partner. The
wisest course of action is to make as little fuss as possible. The teacher
carefully dabs the unwanted paint/water off the paper with a clean sponge or
cloth and then continues with the lesson. On the extremely rare occasion that the
paper has been irrevocably damaged, it might be best, quietly and firmly, to
replace it with a fresh sheet. However, starting again, with fresh paper,
should not happen merely if a child is not happy with their painting, as it is
also part of the learning process that things can go wrong and that valuable
lessons can be learned from mistakes for next time.
Clearing Up
This is quite a challenge, although much diminished if
carefully planned beforehand.
The children will finish their paintings at
different times but the fast ones will need to be taught to retain the quiet
mood for those classmates who take their time. This is a good time for picture
books (or quiet reading for the older ones), modelling or drawing, so the
teacher will need to think carefully how this part of the lesson should be
orchestrated. How do the children indicate that they have finished without
causing a disturbance? Should they be asked to place their paintings in the
board rack or do they wait until everyone has finished? Do they have a book or
some plasticine or modelling wax ready in their desks or do they get up and
fetch these from the bookshelf or cupboard? Do they settle in the story corner
(if there is one)? Do they begin to tidy up their equipment, or wait? These are
questions that each teacher will need to decide on individually, bearing in
mind that ideally the quiet atmosphere is retained.
Once everyone has finished and has carefully placed their
paintings in the board rack (one row or table at a time works well), individual
children are again given tasks – to collect brushes, sponges, palettes with
paints and water jars, while the rest of the class carries on reading,
modelling or drawing quietly at their desks. Too many people up and about at
one time inevitably cause an unnecessary rumpus. Brushes need to be rinsed
well, as do the sponges and water jars before being put back in the cupboard.
This is of course easier if there is a sink in the classroom but often there
isn’t and the teacher will need to be prepared for that with buckets – an empty
one for dirty water and one or two with clean water for rinsing brushes,
sponges and jars. Last of all, a couple of children are given the task of
wiping down residual water or paint off the desks. Once everything has been
cleared away, there may be time for the teacher to read a few pages from a
story book that he/she has on the go – always a popular way to fill a few spare
minutes before it is time for the lesson to end.
Reviewing the
paintings
The paintings usually take a good twenty four hours to dry,
after which the teacher removes them from the boards and pins them up on the
classroom wall. They might be hung in neat rows or perhaps in groups, for
reviewing purposes, and invariably cheer up the classroom no end.
The children
always find it very exciting to see their fresh paintings up and during main
lesson time the following day, some time is spent with the whole class eagerly
looking at the paintings and sharing ideas, thoughts and inspirations about
them. The teacher shares observations such as ‘Do you see how that little patch
of red here is trying to push the blue out of the way? Very different to the
red in this one, which has become friendly with the blue and has taken a bit of
its colour, do you see?’ Or ‘Has anyone got an idea why I might have put this
little group of paintings together? Do you remember what I said about Green?’
etc. etc. The purpose here is to elicit an understanding of colour and how
colours relate to and affect one another, for children to become sensitive to
colour moods and how some colours have a tendency to dominate. The children
themselves come up with wonderful, insightful comments too: ‘That yellow in
that painting looks so sunny and happy!’ or ‘That picture makes me feel as if
I’m in a forest’ etc. etc. It is important to steer the children away from
making critical or judgemental comments such as ‘I really like this one’ even
if they are being positive as it is not the critical faculties that we are
trying to educate at this stage. Children are understandably also extremely
sensitive about their creations, so one has to be careful. By praising one
child for having managed to paint two colours without them mixing (if that was
the task) is enough to teach another child who didn’t manage so well in that
exercise to try harder next time. It is important to work with descriptive
praise (‘Look, you can really see the delicate brush strokes here – they look
like little blue waves’) and positive reinforcement. If a child has had a bad
experience the previous week, actively seek out something extra positive
(albeit true) that you can comment on the following week; in this way you build
confidence and empower the children.
Paintings don’t have to remain on the walls for too long – a
couple of weeks is enough, as there usually isn’t enough wall space. If there
is space, a teacher could leave one painting from each week on the wall, making
sure it is from a different child each time of course. In this way the class
can enjoy the progression of exercises over a longer period of time.
Class 3 and Beyond
By Class 3 (aged 9) the children have made sufficient
progress in handling the different techniques to enable them to begin creating
form out of colour.
Moreover, at this age the children are beginning to develop
a real interest in the world around them, so it is natural that they move from
mere colour exercises to depicting the world around them in form. The painting
techniques, nevertheless, stay the same. Shapes come into being not by painting
an outline of the object but by placing a patch of colour on the paper and
extending it, to create characteristics like the legs of an octopus or the
horns of a cow lying in a meadow, for instance. In the case of the cow, one
could begin by covering the entire surface of the paper with a light wash of
ultramarine. The upper part will be the sky while the lower part could then be
painted over with lemon yellow, creating a green meadow, making sure that a
roundish patch of blue remains, which will take the shape of a cow lying down.
A little vermilion could help to enhance the cow shape by creating shadow and a
three dimensional quality, as well as giving it a brownish hue. By this time
the teacher will have acquired some technical skill and, by means of a little
experimentation, will be able to develop the skills to bring out form.
Another valuable technique is ‘painting out’. A white bird
in a blue sky will be more alive and will give the impression of flight more
successfully if one starts with a blue sky and then, with a dry, clean brush,
and paints out the blue to allow a bird to emerge. Depending on what one is
aiming to paint it is often effective to begin with a light wash in a
particular colour, covering the entire sheet of paper. This creates a mood,
provides a background which doesn’t then have to be added later and enables one
to build colour upon colour to create depth. Thus, when painting a flower, one
might start with a warm, sunny wash and against that warmth bring out the
shape of the flower. The background must start off light though, so that the
possibilities remain open. It goes without saying that these skills are only gradually acquired by the children and take a lot of practice,
not least by the teacher, who can guide and help them with small steps at a time.
Topics and Themes
In Class 3 the Old Testament stories provide a rich source
of subject matter.
Many teachers begin with the seven days of creation during the Old Testament main lesson.
The Third Day of Creation

The Fifth Day of Creation

The expulsion of Adam and Eve from Paradise (Genesis)


Archangel Michael wielding his sword...

Below are some wonderful renditions of Noah's Ark:
Noah's Ark


Other examples might include the Tower of Babel,
Jacob’s Ladder, Joseph and his many-coloured Coat, Moses and the Burning Bush,
to name but a few. Alternatively, themes could be related to the festivals and
the cycle of the year – Michael and the Dragon, Joseph and Mary, the Three Magi
etc. These seasonal themes, especially, can be returned to again and again
throughout the Lower
School
In Class 4 the Steiner Waldorf curriculum offers the wealth of the Norse
Myths.
Here is a Viking ship in full sail...


.jpg)
The Human and Animal main lesson is inspiring too:


Cuttle Fish

Swans and Cygnets

Tortoise

Pony in Field

Stag

In Class 5 painting maps is a delightful activity as well as depicting dramatic scenes from ancient mythologies
Ahura Mazda creates cereals in Ancient Persia

or painting the subtle, warm, sharp and strong colours
that belong to India , Egypt and Greece:
Ancient Greek Temple

The Botany block in Class 5 is another gift for painting
fungi, trees and flowers, and the insects that pollinate them.
Here are two trees, painted
during the same lesson. Note the difference!
Here are two trees, painted
during the same lesson. Note the difference!
Tree in autumn wind


Conifers


Another tree in autumn wind!
Conifers

Oak in Spring

Irises

Roses

In Class 6 the curriculum guides the children through the
Roman Empire, another great source of inspiration, with temples, statues,
soldiers, Hadrian’s Wall to name but a few.Maps can be developed in greater detail, as can landscapes
of the countries studied (Europe in the case of schools in the UK ). Geology,
too, allows for the painting of mountains, glaciers, volcanoes, limestone caves
and sandstone wonders such as Durdle Door in Dorset ,
for example.
Veiling
In Class 6 another important painting technique is
introduced, known as ‘veiling’.
This technique bridges the gap between ‘wet on wet’ painting
and more conventional water colour painting.
The wet paper is fastened to the
board with paper tape and allowed to dry; this stretches the paper. Once dry, a coat of a very diluted wash of a
particular colour is carefully painted onto an area of the paper (i.e. the four
corners) and is then allowed to dry. Once dry, a second layer is added, partly
overlapping the area already painted. More layers are added, partially
overlapping and partially covering a fresh area. Another colour might be added,
equally dilute. The effect is a build up of colour, which creates tremendous
depth as well as subtleties of shape and colour that have hitherto not been
experienced.
Veiling is a very slow process, which requires an enormous
amount of patience and it is recommended that it is done simultaneously with another
artistic activity. This requires careful planning. As soon as I have some good examples of this I shall add them to the blog.
In Classes 7 and 8 the content of the curriculum continues
to provide inspiration for painting, such as the voyages of discovery in Class
7
Christopher Columbus arriving in America

or historical events such as the Great Fire of London in
Class 8.
Here is a winter landscape, painted in Class 8 over a number of weeks. The veiling technique was partly used here, although not entirely. Here is perhaps a good place to mention what Diana Westlake is keen to point out - how the art of watercolour painting has a long and distinguished history in Britain, with William Blake, William Turner and many others. This aspect of English culture might well have had some influence in the development of the painting approach in Steiner schools, although the 'wet on wet' technique of course differs from working on dry paper, which perhaps resembles the 'veiling' technique more.

Winter landscape
By Class 8, however, the teacher will regularly be
experimenting with different media, creating group paintings and moving away
from the ‘wet on wet’ technique discussed here, so inspiration for these
alternatives are beyond the scope of this blog.
Frequently Asked Questions
Q: Why do we paint ‘wet on wet’ in Steiner
Waldorf schools?
A: Bearing in mind
that our starting point is to feed the soul and to awaken a sense of beauty in
the children, ‘wet on wet’ painting was recommended by Rudolf Steiner, as the
colours produced by means of this method are exceptionally pure and
translucent. In nature, watching the sheer beauty and radiance of a rainbow in
the sky can fill even an adult with awe and we become aware that no solid object
on earth has such sublime colours. Sadly, painting with sheer light in air is
impossible, but using water as a colourless medium for carrying colour is the
next best thing.
Painting for children is more about the process than the end
product. The way the colours move and mingle on the wet paper without
immediately becoming fixed (as is the case with poster paints, for instance),
is very healing and enlivening for the senses. The fact that, once dry, the
paintings lose something of their translucent quality is really not so
important.
Q: Is it essential that we use organic paints?
A: It is best not to be too dogmatic about these things and there are some very high quality
watercolour paints around that are not organic. However, the organic Stockmar
paints that are mostly used in Steiner schools were developed precisely for
the purpose of providing the purest, most translucent colours for painting ‘wet
on wet’ and they are therefore to be recommended. The six colours that are used
in Lower School
Q: People often comment on our children’s
paintings all looking the same. How
can I best respond to this?
A: People frequently
need to be reminded that in our schools we do not go in for free self
expression from an early age. The purpose of painting in the Lower School Lower School and in the Upper School
Q: At
what stage in the Lower
School
A: Children of
course use wax crayons from Class 1 onwards. From Class 3 these could sometimes
be used to add detail to paintings (see below). From Class 6 teachers often
introduce watercolour pastels for the sake of variety and also because pastels
are somewhat more forgiving and are a help to new or less gifted children,
while the colour experience remains rich and varied. In Class 8 some teachers
have introduced gouache and even acrylic paint, depending on the project.
Q: Can one mix media, i.e. use wax crayons or pastels as
well as paint in the same picture?
A: Yes,
occasionally, if the teacher would like the children to enhance the painting
with detail. They might paint the Tower
of Babel or Noah’s Ark , for instance. Once dry, workmen,
scaffolding, baskets with bricks might be drawn in (in the case of the former)
and Noah’s family and several pairs of animals be added (in the case of the
latter). It could also be done the other way round: Adam and Eve might be drawn
surrounded by flowers and a serpent coiling round the Tree of Knowledge, while
the background (the ground, the sky and more plants) is painted afterwards.
These examples remain the exception to the rule though; painting is essentially
a joyful immersion in colour for its own sake. Here are two examples of Class 7 paintings where paint was used to begin with and some details were added in pastel:
 :
:

Journey of the Magi
 :
:
Jungle scene

Q: Can I work with the four temperaments in
painting lessons?
A: The short answer
to this is ‘yes!’ However, this is a huge subject which really goes beyond the scope of this blog. Painting can be a great diagnostic tool if you are not sure
what temperament a child is. Does
he/she paint very wet? Is there an unwillingness to commit paint onto paper? Is
the painting rushed or extremely slow to develop? Are there particular colour
preferences? Does a child become frustrated and deliberately spoil his or her painting? As you are working with a class and not with an individual child,
if you specifically address a group of children of a certain temperament within that class with a particular
exercise, you will necessarily include all the others as well. This is fine;
another time it might be another group that you focus on. Or it could be the
whole group that has a certain temperamental tendency that needs to be worked
with.
Q: I am extremely unartistic and painting scares
me. What do I do?
A: No class teacher
is gifted in all the areas that they teach. Practice is the key, and lots of
enthusiasm. There are often short courses in the holidays (which the school
might well finance) or a colleague might be able to give some extra help. In
the end it is the effort that goes into your work that the children will learn
from and not your great gifts as an artist. I think it is really important that you
don’t give up and hand the task over to a colleague, if you can possibly help
it, at least not before Class 7 or 8.
Q: How do we help children who join the school
later? Can they catch up in
learning the techniques?
A: This can be quite a challenge, as some children will never have held a brush in their lives. If
they are keen, they will quickly catch up with the others, partly through
watching them and partly with a little bit of focus on the teacher’s part. New
pupils from Class 6 upwards might find it an extra struggle as their peers’
abilities are already quite advanced. For these children in particular the use
of watercolour pastels can be good. This medium lies somewhere between painting
and drawing. Mistakes can be drawn over and disappear and pupils have more
control to develop their skills, while experiencing the satisfaction and
pleasure of working with the colours.
We live in an unprecedentedly mechanized, technological and computerized world. The child is surrounded - one might almost say bombarded - by this aspect of civilization from all sides. Hand in hand with this there inevitably arises the danger that the soul itself can become mechanized and rigidified into linear, digital lines of thought and feeling. The great antidote to this is art, which feeds the soul with elements of the world that are filled with dynamism and life (PK, South Africa).
I like to occasionally suggest unguided painting - to see what the children have incorporated into their pictures from what they have learned (DS, UK).
I like to occasionally suggest unguided painting - to see what the children have incorporated into their pictures from what they have learned (DS, UK).
One can work
pedagogically with the temperaments and with social issues, through the colour
story/imagery spoken to the children before the painting begins. Thus there can
be a real healing quality to the work.
Creative work in this
watery realm can be a blessing for children with difficulties in fine motor
skills – they develop their gross motor skills with archetypal forms – for
example, circles, spirals, strips of colour) – before being asked to create
something more defined. Hand-eye coordination develop.
The painting lesson allows the teacher an additional opportunity to see
into the soul of each child. The comparative aspect – since all the children
paint their own version of the same painting – is another valuable pedagogical
tool, from which a teacher can gain insight. The children’s own appreciation of
each other’s work can be very heartening, especially for children who may
struggle in other areas of their learning (HdeB, UK).
I notice if the children haven't had painting. I haven't noticed any further influence probably due to lack of experience! (PB, UK).
I notice if the children haven't had painting. I haven't noticed any further influence probably due to lack of experience! (PB, UK).
Painting with water colour enables the children to have an experience of pure colour that is fluid, and this produces a therapeutic effect on the soul of the child as the colours 'speak' to the child from the paper, especially if the teacher has managed to bring the character of the colours.
I think it's important to get the preparation of putting away well-organized, as this made me anxious to begin with. More fundamentally, it's important to create pictures in a living way so that the colours live in the classroom and this takes practice! It's also important to have a plan for the year, yet have the flexibility to sense what is needed in the moment for the children (VW, UK).
I do hope this introduction has been helpful. I would be grateful for some feedback and please don't hesitate to let me know of anything that I have omitted that others might find useful. I would also welcome good examples of artwork, carefully selected by you, to add to the gallery, particularly some good examples of veil paintings. It would also be useful to share other helpful website links on this blog.
.A great many books have been written on the subject of teaching painting in Steiner Waldorf schools and I urge you to explore this topic further. I especially recommend the following:
- Painting in Waldorf Education by Dick Bruin and Attie Lichthart (translated from Dutch and published by AWSNA)
- Painting and Drawing in Waldorf Schools - Classes 1 to 8 by Thomas Wildgruber (translated from German and published by Floris Books)
- Drawing and Painting in Rudolf Steiner Schools by Margrit Jueneman and Fritz Weitmann (translated from German and published by Hawthorn Press).
Acknowledgements
I would like to thank very warmly the following people for their help and support in creating this blog: first, the colleagues who responded to my questionnaire about their painting experiences or invited me into the classroom to take some photos; and secondly, members of our families for the useful advice and ideas on layout and distribution. Most important, however, is a very big 'Thank You' to the many children whose creations we have 'borrowed' as well as to the teachers that have inspired them.
I would like to thank very warmly the following people for their help and support in creating this blog: first, the colleagues who responded to my questionnaire about their painting experiences or invited me into the classroom to take some photos; and secondly, members of our families for the useful advice and ideas on layout and distribution. Most important, however, is a very big 'Thank You' to the many children whose creations we have 'borrowed' as well as to the teachers that have inspired them.
This leaves us with nothing more to say than good luck and enjoy painting!
Diana Westlake
Antoinette Reynolds
Hi Diana, the article give us the clear idea of how to paint. I have started my kindergarten school in India and very new to this wet on wet painting, could you share some of insigbts of this kind of painting with the kindergarten children as we use only single colour. What does a child experience in painting?
ReplyDeleteHello there! I am so sorry that it has taken me such a long time to reply to your question; I hope it is still relevant.
DeleteYou can use more than one colour in painting with children in the Kindergarten; you can use all the primary colours (fairly diluted) and even allow them to mix. The chief difference is that in the Lower School you are beginning to teach them technique and to become consciously aware what happens to colours and what moods they might create, while in Kindergarten they are playing with them, allowing their brushes to be playful, together with their teacher, who is painting with them. The aim here is simply to experience the world of colour. The painting usually lasts for no more than ten minutes and after that they help in clearing up.
I hope this helps! Antoinette Reynolds
This is a really good site post, i am delighted I came across it. I will be back down the track to check out other posts that
ReplyDeletebest paint by numbers for adults
This is an excellent post. I would love to see another one like it on block Crayons and the appropriate usage.
ReplyDeleteLove your article and great work providing enhanced knowledge to us in such a fascinating way and if you allow I also have some amazing stuff to show you guys about animals paint by number kits its just a phenomenal work they are doing here!
ReplyDeleteImpressive paintings, although the approach is somewhat different to the above! Thank you for sharing.
ReplyDeleteAntoinette
Wonderful information for people looking out for this sort of hobby and meanwhile I would like to share a great source of animal diamond painting kits for kids and adults
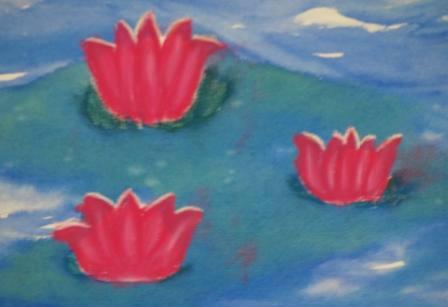
ReplyDeleteLove your article and great work providing enhanced knowledge to us in such a fascinating way and if you allow I also have some amazing stuff to show you guys about lotus flower paint by number kits its just a phenomenal work they are doing here!
ReplyDeleteThis comment has been removed by the author.
ReplyDeleteReally great initiative, love how art is being used in education like this. I’ve been exploring some Abstract Paint by Numbers lately, and it’s opened up a new way of thinking about shapes and color. Inspiring work!
ReplyDelete